YouTube has become the world's largest free university. From MIT OpenCourseWare to Khan Academy to independent lecturers covering niche topics, there has never been more high-quality educational content available at zero cost.
But watching a lecture and actually learning from it are very different things. YouTube as a study medium introduces obstacles that a real classroom doesn't: the autoplay queue is engineered to pull your attention toward the next video, there's no professor enforcing pace, and the interface has no built-in pause-to-think prompts. Without a deliberate note-taking system, a 90-minute lecture becomes 90 minutes of passive consumption that leaves very little behind.
The second obstacle is structural. YouTube videos have no natural breakpoints for retrieval practice. A textbook has end-of-chapter questions. A lecture hall has a professor who stops and asks "any questions?" YouTube just keeps playing. If you don't build retrieval into your workflow yourself, you will watch, feel like you understood, and forget 70% within 48 hours — consistent with what Ebbinghaus's forgetting curve research has shown for a century.
The difference usually comes down to how you take notes.
Here are the five most effective strategies for taking notes from YouTube lectures — with step-by-step workflows, tool recommendations, and worked examples for each — and the one most students have never tried.
1. The Cornell Method: Classic for a Reason
What It Is
The Cornell method divides your notes into three sections: a narrow left column for cues and questions, a wide right column for notes, and a bottom section for summaries. It was developed at Cornell University in the 1950s by Walter Pauk as a system for lecture note-taking specifically — not for reading, not for research, but for the exact situation you're in when watching a YouTube lecture: content arriving at someone else's pace, and you need to capture and retain it.
Who It Works Best For
Cornell is the default recommendation for content-heavy lectures with a clear conceptual hierarchy: science, economics, history, law, medicine. If the lecturer introduces terms, explains them, and then applies them to examples, Cornell maps to that structure naturally. It's less intuitive for math-heavy content where the "notes" are mostly worked examples, but even there, a modified version works — the note column captures the worked example step by step, and the cue column captures the underlying principle.
The Step-by-Step
- Before the video, draw the page: right column takes ~70% of width, left column ~30%, a horizontal line across the bottom for the summary (roughly 5–6 lines).
- During the video: Write in the right column only. Bullet points, not sentences. Focus on concepts and examples, not transcription. Abbreviate aggressively. If the lecturer says something you don't understand, write a "?" next to it.
- Immediately after the video: Go back through the right column and write a cue — a question or keyword — in the left column for each major note. "What is backpropagation?" next to your neural networks bullet. "Why does this fail for non-convex problems?" next to gradient descent.
- Still immediately after: Write a 2–3 sentence summary of the entire video from memory in the bottom section. Don't look at your notes while writing it.
- That evening or next morning: Cover the right column completely. Work through each cue question out loud. What you can't answer gets revisited.
The retrieval practice built into the Cornell method is why it works. You are not just recording information — you are building the connections that move it from working memory into long-term storage. The 2014 Mueller and Oppenheimer study at Princeton found that students who processed information during note-taking retained significantly more on conceptual questions a week later than students who transcribed. The forced compression Cornell requires is exactly that kind of processing.
Trade-offs
The weakness is post-lecture overhead. Filling in the cue column and summary requires 10–15 minutes after the video that many students skip — and without those steps, Cornell notes are just an expensive right column. If you're watching five lectures in a row, that overhead adds up.
Tools
- Pen and paper: The original. Fastest to draw, but you can't link to your other notes.
- Notion: Create a template with a two-column table. Set up the column widths once and duplicate for every lecture.
- Obsidian: No native Cornell template, but a community plugin (Templater) can generate the page structure automatically.
- Notiq: Generates the cue column and summary automatically from the video transcript. You write the right column; Notiq fills in the parts most students skip.
Worked Example
Applied to a 45-minute 3Blue1Brown video on the essence of calculus: the right column captures the geometric intuition behind derivatives (slope of a tangent line at a point), the relationship between area and antiderivatives, and the chain rule demonstration. The left column becomes questions: "Why does the area under a velocity curve give displacement?" and "When does the chain rule apply?" The summary: "Derivatives measure instantaneous rate of change geometrically; the fundamental theorem connects differentiation and integration by showing they undo each other." That summary, written from memory, does more for retention than re-watching the video would.
For a deeper treatment of this method — including how AI changes the workflow — see our full guide on the Cornell method with AI.
2. The Outline Method: Fast and Flexible
What It Is
The outline method is the simplest: you create a hierarchical tree of ideas as the video plays. Main concepts at the top level, sub-points indented below, specific details indented further. Most people learn some version of this in school. It earns its status as the default for a reason.
Neural Networks
  - What they are
    - Algorithms that learn from data
    - Inspired by biological neurons
  - Key components
    - Input layer
    - Hidden layers (depth = number of hidden layers)
    - Output layer
  - Training
    - Loss function measures error
    - Gradient descent minimizes loss
    - Backpropagation computes gradients efficiently
Who It Works Best For
Students who need to capture a lot of ground quickly without high overhead. Outline method is ideal for fast-paced tutorials, lecture series where you're watching multiple videos back-to-back, and content where the hierarchy is clear and linear. It also works well as a first pass when you're not sure yet which parts of a subject matter most.
The Step-by-Step
- Start a new document (or page) for each video. Title it with the video title and date.
- As the video plays, write the main topic as a top-level item each time the lecturer shifts focus.
- Indent sub-points beneath each main topic as the lecturer develops the idea.
- Write in your own words, not the lecturer's. If you find yourself typing what the lecturer is saying verbatim, stop and paraphrase.
- After the video, scan the outline and add one bolded "key insight" per section — one sentence that captures why that section mattered.
Trade-offs
The outline method is fast to write and easy to review. Its weakness is that it can feel superficial if you just list topics without understanding the relationships between them. An outline of things you don't understand is an organized copy of confusion. The other risk is over-transcription — the format makes it easy to type faster and process less, which is the opposite of what good note-taking requires.
The other limitation: outlines don't naturally connect to each other. Notes taken in a course over a semester sit in separate files with no cross-links. For exam prep that's fine; for building lasting knowledge, it's a dead end.
Tools
- Notion: Toggle blocks let you collapse sections that aren't relevant to your current review.
- Obsidian: Every outline lives as a Markdown file. You can add
[[links]]to cross-reference concepts across videos. - RemNote: Outlines double as flashcard decks — every indented item is a card candidate with one click.
- Apple Notes or Roam Research: Both are outline-first editors by design.
- Pen and paper: Entirely viable; just be honest about whether you're paraphrasing or copying.
Worked Example
Applied to a 30-minute Andrej Karpathy lecture on GPT from scratch: the outline captures four main sections (tokenization, the attention mechanism, the transformer block, and training the model). Each section has 4–6 sub-bullets. The key insight added afterward for the attention section: "Attention lets each token 'look at' all other tokens and weight how much to attend to each — this is the core mechanism that makes transformers different from RNNs." Writing that sentence required understanding, not transcription.
3. The Charting Method: For Data-Heavy Content
What It Is
If the lecture involves comparing things — programming languages, economic models, historical periods, biological processes, sorting algorithms — a simple table captures relationships better than any other format. The charting method means designing a comparison table before the video starts and filling it in as the video plays.
Who It Works Best For
Students studying subjects with multiple entities that share the same attributes: comparative biology (organelles, cell types), computer science (algorithms, data structures, language features), economics (market structures, fiscal policies), history (regimes, treaties, empires), chemistry (reaction types, compounds). If the lecture's underlying structure is "here are N things, and here are their properties," charting is the right tool.
The Step-by-Step
- Watch the first 2–3 minutes of the video to identify what's being compared and what dimensions matter.
- Draw a table: items being compared are rows, attributes are columns. Common attributes: definition, when to use it, advantages, disadvantages, real-world example.
- Play the video and fill in cells. Don't pause to write long sentences — bullet fragments per cell work.
- After the video, fill in any empty cells from memory. If you can't, that's a retrieval gap worth noting.
- Add a row at the bottom: "My verdict" — one cell per attribute saying which item wins and why.
Trade-offs
Charting only works when you can anticipate the structure before the video. If the lecture surprises you with categories you didn't expect, you'll be reshaping the table mid-video. It's also a poor choice for narrative-driven content — history lectures that tell a story rather than compare entities, or mathematics lectures that build a derivation step by step.
Another limitation: the table format doesn't reveal why the differences exist, only that they do. For deeper understanding, add a notes section below the table for causal explanations.
Tools
- Notion: Native table blocks. Can be turned into a database with filtering for later review.
- Obsidian: Markdown tables work; the Dataview plugin lets you query across tables in multiple notes.
- Google Sheets or Excel: Best for wide tables with many columns; easier to scroll than any note app.
- Pen and paper: Fast to sketch before the video starts; the limitation is fitting enough columns.
- Notiq: Automatically detects comparison-heavy content and generates structured tables in the study notes output.
Worked Example
Applied to a 40-minute MIT lecture comparing sorting algorithms: columns are "Algorithm," "Best Case," "Worst Case," "Space Complexity," "Stable?," "When to Use." By the end of the video the table has rows for bubble sort, merge sort, quicksort, heapsort, and insertion sort. The "My verdict" row reads: "Merge sort for guaranteed O(n log n) with stability; quicksort for average-case speed when memory is tight." That synthesis appears at the bottom of the table and requires a judgment call — exactly the kind of active processing that produces retention.
4. Mind Mapping: For Visual Thinkers
What It Is
Start with the main topic in the centre of a blank page and branch outward as the lecturer introduces related concepts. Each branch is a theme; each sub-branch is a detail. The structure is radial and spatial rather than linear. Mind mapping was popularized by Tony Buzan in the 1970s, but the underlying cognitive rationale is sound: some knowledge is genuinely non-hierarchical, and forcing a network of ideas into a linear outline discards the relationship structure that makes sense of them.
Who It Works Best For
Visual thinkers and spatial learners who find linear notes limiting. Mind mapping is particularly strong for interdisciplinary content where concepts from different domains intersect — a lecture on the history of calculus that connects mathematics, physics, and philosophy simultaneously is easier to capture as a map than as an outline. It's also effective for synthesizing a whole subject before an exam, when you already know the material and want to see how it connects.
The Step-by-Step
- Write the main topic of the lecture in the center of a blank page (or canvas).
- As the video plays, add a branch for each major theme the lecturer introduces. Keep branch labels short — 2–4 words.
- Add sub-branches for details, examples, and definitions hanging off each main branch.
- Use color or line weight to indicate importance or connection type. Connections between branches (a concept in one theme that relates to a concept in another) get a dotted line.
- After the video, spend 5 minutes adding any connections between branches you noticed but didn't draw during the video.
- Write a one-sentence "so what" at the bottom of the map that explains the central argument of the lecture.
Mind mapping forces you to actively decide where each idea belongs, which deepens encoding. The spatial layout also makes it easier to review — your eye can scan a mind map faster than it can re-read pages of text.
Trade-offs
Mind mapping during a live lecture (or video that you're not pausing) is cognitively demanding because you're simultaneously building a spatial structure and processing content. If the video is fast-paced, the spatial overhead can hurt your capture quality. It's also a poor choice for content where sequence matters — mathematical derivations, programming tutorials, step-by-step processes — because the radial structure inherently de-emphasizes order.
Digital mind maps are easier to expand and rearrange than paper; physical maps are faster to sketch and easier to annotate. For study purposes, digital usually wins because you run out of paper space on complex topics.
Tools
- Pen and paper: Fastest and most flexible for drawing during a video. Use A4 landscape or larger.
- XMind or MindMeister: Purpose-built mind mapping apps. Good for polishing a map after the video.
- Miro or Mural: Infinite canvas; good when the map gets large.
- Obsidian (Canvas plugin): Integrates spatial maps with your existing linked notes.
- Notiq: Generates Mermaid diagram-based visual summaries for process-heavy lectures automatically.
Worked Example
Applied to a 55-minute lecture on the French Revolution: the central node is "French Revolution." Five main branches: Causes (financial crisis, Estates system, Enlightenment ideas), Key Events (Bastille, Declaration of Rights, Reign of Terror, Napoleon), Social Structure (First/Second/Third Estate), Key Figures (Robespierre, Danton, Marie Antoinette, Napoleon), and Consequences (nationalism, end of monarchy, Napoleonic wars). Connections link Enlightenment ideas to the Declaration of Rights, and Robespierre to the Reign of Terror. The "so what": "The Revolution replaced divine-right monarchy with popular sovereignty — and then consumed itself, which is why Napoleon was possible." That synthesis only appears if you force yourself to write it.
For more on when mind mapping is the right tool versus Cornell or outlining, see our full comparison in note-taking methods compared.
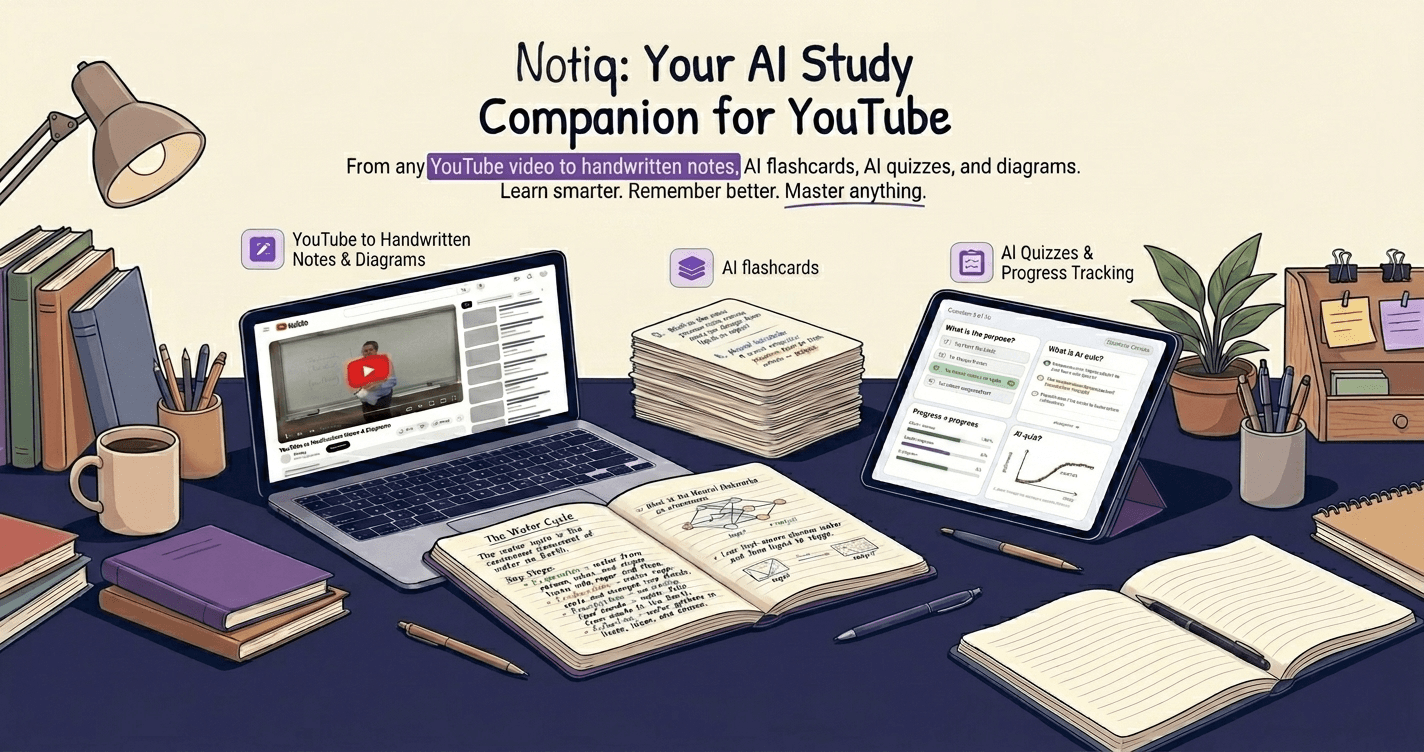
5. AI-Assisted Note Generation: The Method Most Students Are Ignoring
What It Is
Rather than pausing a video every two minutes, tools like Notiq can process the entire lecture transcript and generate structured chapter-by-chapter notes, key concept definitions, exam questions, and flashcards — automatically. The output is a complete draft study document in the time it takes to watch the first five minutes of the video.
This is not about outsourcing your thinking. It's about eliminating the mechanical parts of note-taking — transcription and initial structuring — so you can focus on the cognitive work of understanding, questioning, and connecting.
Who It Works Best For
Students with high lecture volume who can't afford 15–20 minutes of post-lecture processing per video. Medical students watching recorded lectures, self-learners working through a full course on YouTube, and anyone who tends to take notes but never reviews them will get the most immediate benefit. AI-assisted notes are also particularly useful for revisiting content from a lecture you already watched without pausing — you can generate the notes after the fact and use them as a study scaffold.
The Step-by-Step
- Paste the YouTube URL into Notiq (or your AI tool of choice).
- Let the tool generate the structured notes — chapter summaries, key concept definitions, exam questions, and flashcards.
- This step is the one most people skip: Read through the output actively. Mark the concepts that surprised you. Add your own observations in the margins. Highlight anything that conflicts with what you thought you knew.
- Test yourself against the exam questions before looking at the answers.
- Load the flashcards into your spaced repetition workflow (Anki, RemNote, or Notiq's built-in review).
- Go back to the video for any section the notes flagged as important but that you can't explain from memory.
The output typically looks like this:
- Chapter summaries: A concise overview of each section of the lecture.
- Key concepts: Defined terms with context from the lecture.
- Flashcards: Question-and-answer pairs covering the most important ideas.
- Exam questions: Practice questions in the style of the subject.
- Diagrams: Mermaid flowcharts for processes and relationships.
Trade-offs
AI-generated notes have two real weaknesses. First, the model doesn't know what's going to be on your exam or which concepts your professor considers central. It identifies importance from the transcript, not from your course syllabus. You still need to do that filtering yourself. Second, if you use AI notes as a reading substitute — skimming them instead of actually engaging with the video — you'll get the feeling of coverage without the depth. The research on learning is clear: passive exposure to organized information does not produce the same retention as active retrieval. AI notes are a starting point, not a finish line.
The other consideration: AI tools that generate from transcripts are only as good as the transcript. Auto-generated YouTube captions vary in quality; mathematical notation and technical jargon are frequently wrong. Always sanity-check concept definitions against the video or a textbook.
Tools
- Notiq: Purpose-built for YouTube lectures. Generates Cornell-style notes, flashcards, and exam questions from any YouTube URL.
- ChatGPT / Claude: Paste a transcript in and ask for structured notes. Requires manual transcript extraction.
- Whisper + custom prompts: For recorded lectures without auto-captions; transcribes audio and then feeds to a language model.
- Summarize.tech or Eightify: Quick summaries, less depth than full note generation.
Worked Example
Applied to a 45-minute MIT OCW lecture on eigenvalues and eigenvectors: Notiq generates six chapter summaries (definition, geometric interpretation, finding eigenvalues via the characteristic equation, diagonalization, symmetric matrices, and applications). The flashcard deck includes 24 cards. Exam question: "A matrix has eigenvalue λ=0. What does this tell you about the matrix?" Working through that question — without looking at the notes — forces exactly the kind of retrieval practice that produces long-term retention. The student who reads the summary and moves on will forget the material; the student who can't answer the exam question and goes back to the specific chapter section learns it.
For a broader view of how AI fits into a study workflow — and the line between using it effectively and using it to avoid thinking — see how to use AI without cheating yourself.
Which Method Should You Use?
The honest answer is: it depends on the content, and the best students combine methods rather than committing to one.
A useful framework for deciding:
| Dimension | Cornell | Outline | Charting | Mind Map | AI-Assisted |
|---|---|---|---|---|---|
| Effort during video | Medium | Low | Medium | High | Very Low |
| Effort after video | High | Low | Low | Medium | Medium |
| Retention (if followed correctly) | High | Medium | Medium | Medium | High (if active) |
| Best for STEM | Good | Good | Excellent | Poor | Good |
| Best for Humanities | Good | Good | Poor | Excellent | Good |
| Works at speed (1.5x–2x) | Poor | Good | Good | Poor | Excellent |
The most robust workflow for most students: use AI-assisted generation to get a complete structured draft quickly, then apply the Cornell method's retrieval practice by hiding the answers and quizzing yourself from the generated questions. Use charting for any lecture built around comparative content. Sketch a mind map for complex interdisciplinary topics when you want to see how the pieces fit together.
What stays constant across all five methods: passive watching does not create lasting learning. Mueller and Oppenheimer's 2014 study at Princeton showed that students who processed information during note-taking retained significantly more on conceptual questions a week later than students who transcribed. Roediger and Karpicke's testing-effect research at Washington University demonstrated that a single retrieval attempt does more for long-term retention than multiple re-readings. Whatever system you use, the goal is to create something that forces you to retrieve and reconstruct the information later.
The best note-takers do not follow one method rigidly. They have a toolkit and reach for the right tool based on the material.
For a deeper look at active recall strategies that work alongside any of these methods, see active recall techniques. For the full science on why most note-taking approaches fail, see most students take notes wrong.
Notiq turns any YouTube lecture into structured study notes, flashcards, and exam questions automatically. Try it free at notiq.study.